
Hi, Are you searching about How to install tor on ubuntu? If yes, then great you are in the right place. Here, I am going to walk you through the installation process of Tor on Ubuntu. And don’t forget that we are not installing Tor Browser but only tor.
Tor is free software and an open network that helps you defend against traffic analysis, a form of network surveillance that threatens personal freedom and privacy, confidential business activities and relationships, and state security. It was initially a worldwide network of servers developed by the U.S. Navy that enabled people to browse the internet anonymously. Now, it’s a non-profit organization whose main purpose is the research and development of online privacy tools.
Read More: How to install Tor Browser on Ubuntu 20.04 LTS (Focal Fossa)
I am assuming that you have at least basic knowledge of Linux, know how to use the shell, and most importantly, you host your site on your own VPS. The installation is quite simple you need to be running in the root account, if not you may need to add ‘sudo’ to the commands to get root privileges. I will show you through the step by step installation Tor on a Ubuntu 20.04 LTS (Focal Fossa) server.
Page Contents
Prerequisite
Operating System and Software Versions
- Operating System: Ubuntu 20.04
Requirements
Privileged access to your Ubuntu System as root or via sudo command is required.
Difficulty
EASY
Conventions
- # – requires given Linux commands to be executed with root privileges either directly as a root user or by use of sudo command
- $ – requires given Linux commands to be executed as a regular non-privileged user
Step by Step Guide to Install Tor on Ubuntu
1. Adding Tor Repository
First of all, we’ll need to add the repository source so that the package manager ie apt can fetch the required software package from the Tor’s Repository. To do so, we’ll need to run the following commands in a terminal or a shell.
$ sudo nano /etc/apt/sources.list.d/tor_repo.list
Then, we’ll need to add the following lines into the text editor as shown below.
deb http://deb.torproject.org/torproject.org focal main
deb-src http://deb.torproject.org/torproject.org focal main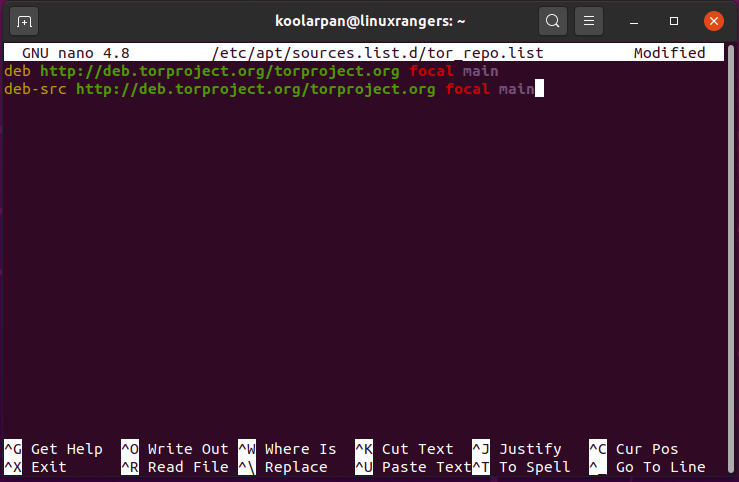
To save the code, press Ctrl + X. And, Press Y for Yes to commit the changes. And Press Enter to save.
2. Installing Curl
Curl is used to transfer data. If you don’t have curl installed then,
$ sudo apt install curl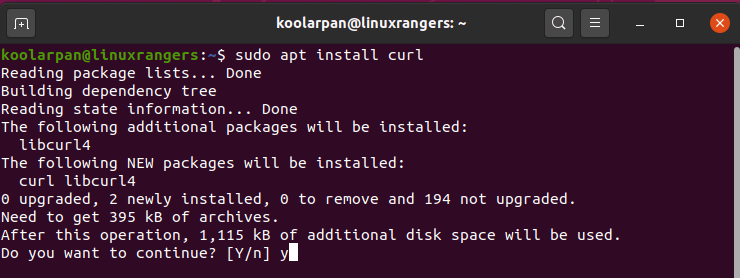
After the installation of curl, run the following command.
Then we’ll need to add the gpg key which is used to sign the packages. To do that, we’ll run the following commands.
$ curl https://deb.torproject.org/torproject.org/A3C4F0F979CAA22CDBA8F512EE8CBC9E886DDD89.asc | sudo apt-key add -

2. Updating the Repository Index
After we have finished installing adding the repository source list. We’ll need to update our local repository index so that we can use it to fetch tor. We’ll run apt manager to update the repository index.
$ sudo apt-get update

3. Installing TOR
Now, finally, we’ll install TOR by running apt manager in a terminal.
$ sudo apt-get install tor deb.torproject.org-keyring

4. Running TOR
Finally, as we have successfully installed it in our Ubuntu 20.04 LTS “Focal Fossa” machine, we’ll now want to run tor client daemon out of the box. To run tor, we’ll need to run the following command in a terminal with root permission.
$ sudo systemctl start tor
Now, as we can see that our daemon is running, we now need to configure the network connection of the application or browser we want to get anonymous. The only small thing we’ll need to do is to set the proxy IP: port to 127.0.0.1:9050 which will point to the TOR network.

5. Testing TOR on Firefox

As we can see the IP of my machine has been changed and the Services is Tor Exit Node. This concludes that our tor is up and running.
Conclusion
In this tutorial, we learned how to install Tor on Ubuntu 20.04 LTS “Focal Fossa”. Tor is really an awesome project. It enables us to remain anonymous but to be honest, the level of anonymous is not 100% secure and anonymous. Some Government organizations like NSA, FBI can really break into through this and can check whether you are running tor or not. So, please be secure and beware of the Government. The Tor network consists of an awesome anonymity network.
If you have any questions, suggestions, feedback please don’t hesitate to write them in the comment box below because it will help us to improve or correct our contents.
Read More: How to install ReactJS on Ubuntu 20.04 LTS Focal Fossa